6 Fixes for Windows 11 not detecting HDMI Monitor
The best way to get AV signal from a Windows 10 computer to a monitor or TV is using an HDMI cable. It reduces the clutter of too many wires with 3.5mm RCA cables.
A USB connection requires two connections. One for display and other for audio. An HDMI connection makes it easy to connect a Windows 11 PC to an external monitor. The crystal clear sound is another benefit of HDMI.
Once you plug the HDMI cable in the PC port and the other end on the TV, you should get a display. For some naughty reason Windows 11 may not detect the HDMI monitor.

In such cases, you can use this check-list to confirm if the hardware is working.
- Make sure the HDMI plug is not rusty. Otherwise, clean it with a steel blade. Normally these come with gold covering which prevents this problem.
- The PC and TV HDMI ports also should be clean. You can do the same as above if they are not properly visible.
- Make sure both the HDMI ends are seated properly on PC and TV. If you don’t get a display, remove them and plug it back in again.
- The display resolution and refresh rate on the TV and PC should be compatible with recommended settings.
- Otherwise, change the Windows 11 HDMI settings to suit the correct picture and sound.
- Make sure the right HDMI port on the external monitor is plugged in from the Windows 11 computer. You should see a green or blue indicator for that port if it is working.
- Use the right HDMI cable with correct specifications that suits your Windows 11 PC and TV.
- HDMI TV or Monitor should not have any screen problems.
If Windows 11 is not detecting an HDMI monitor, then you can follow these fixes.
Fix #1 – Check multiple displays and select the right one
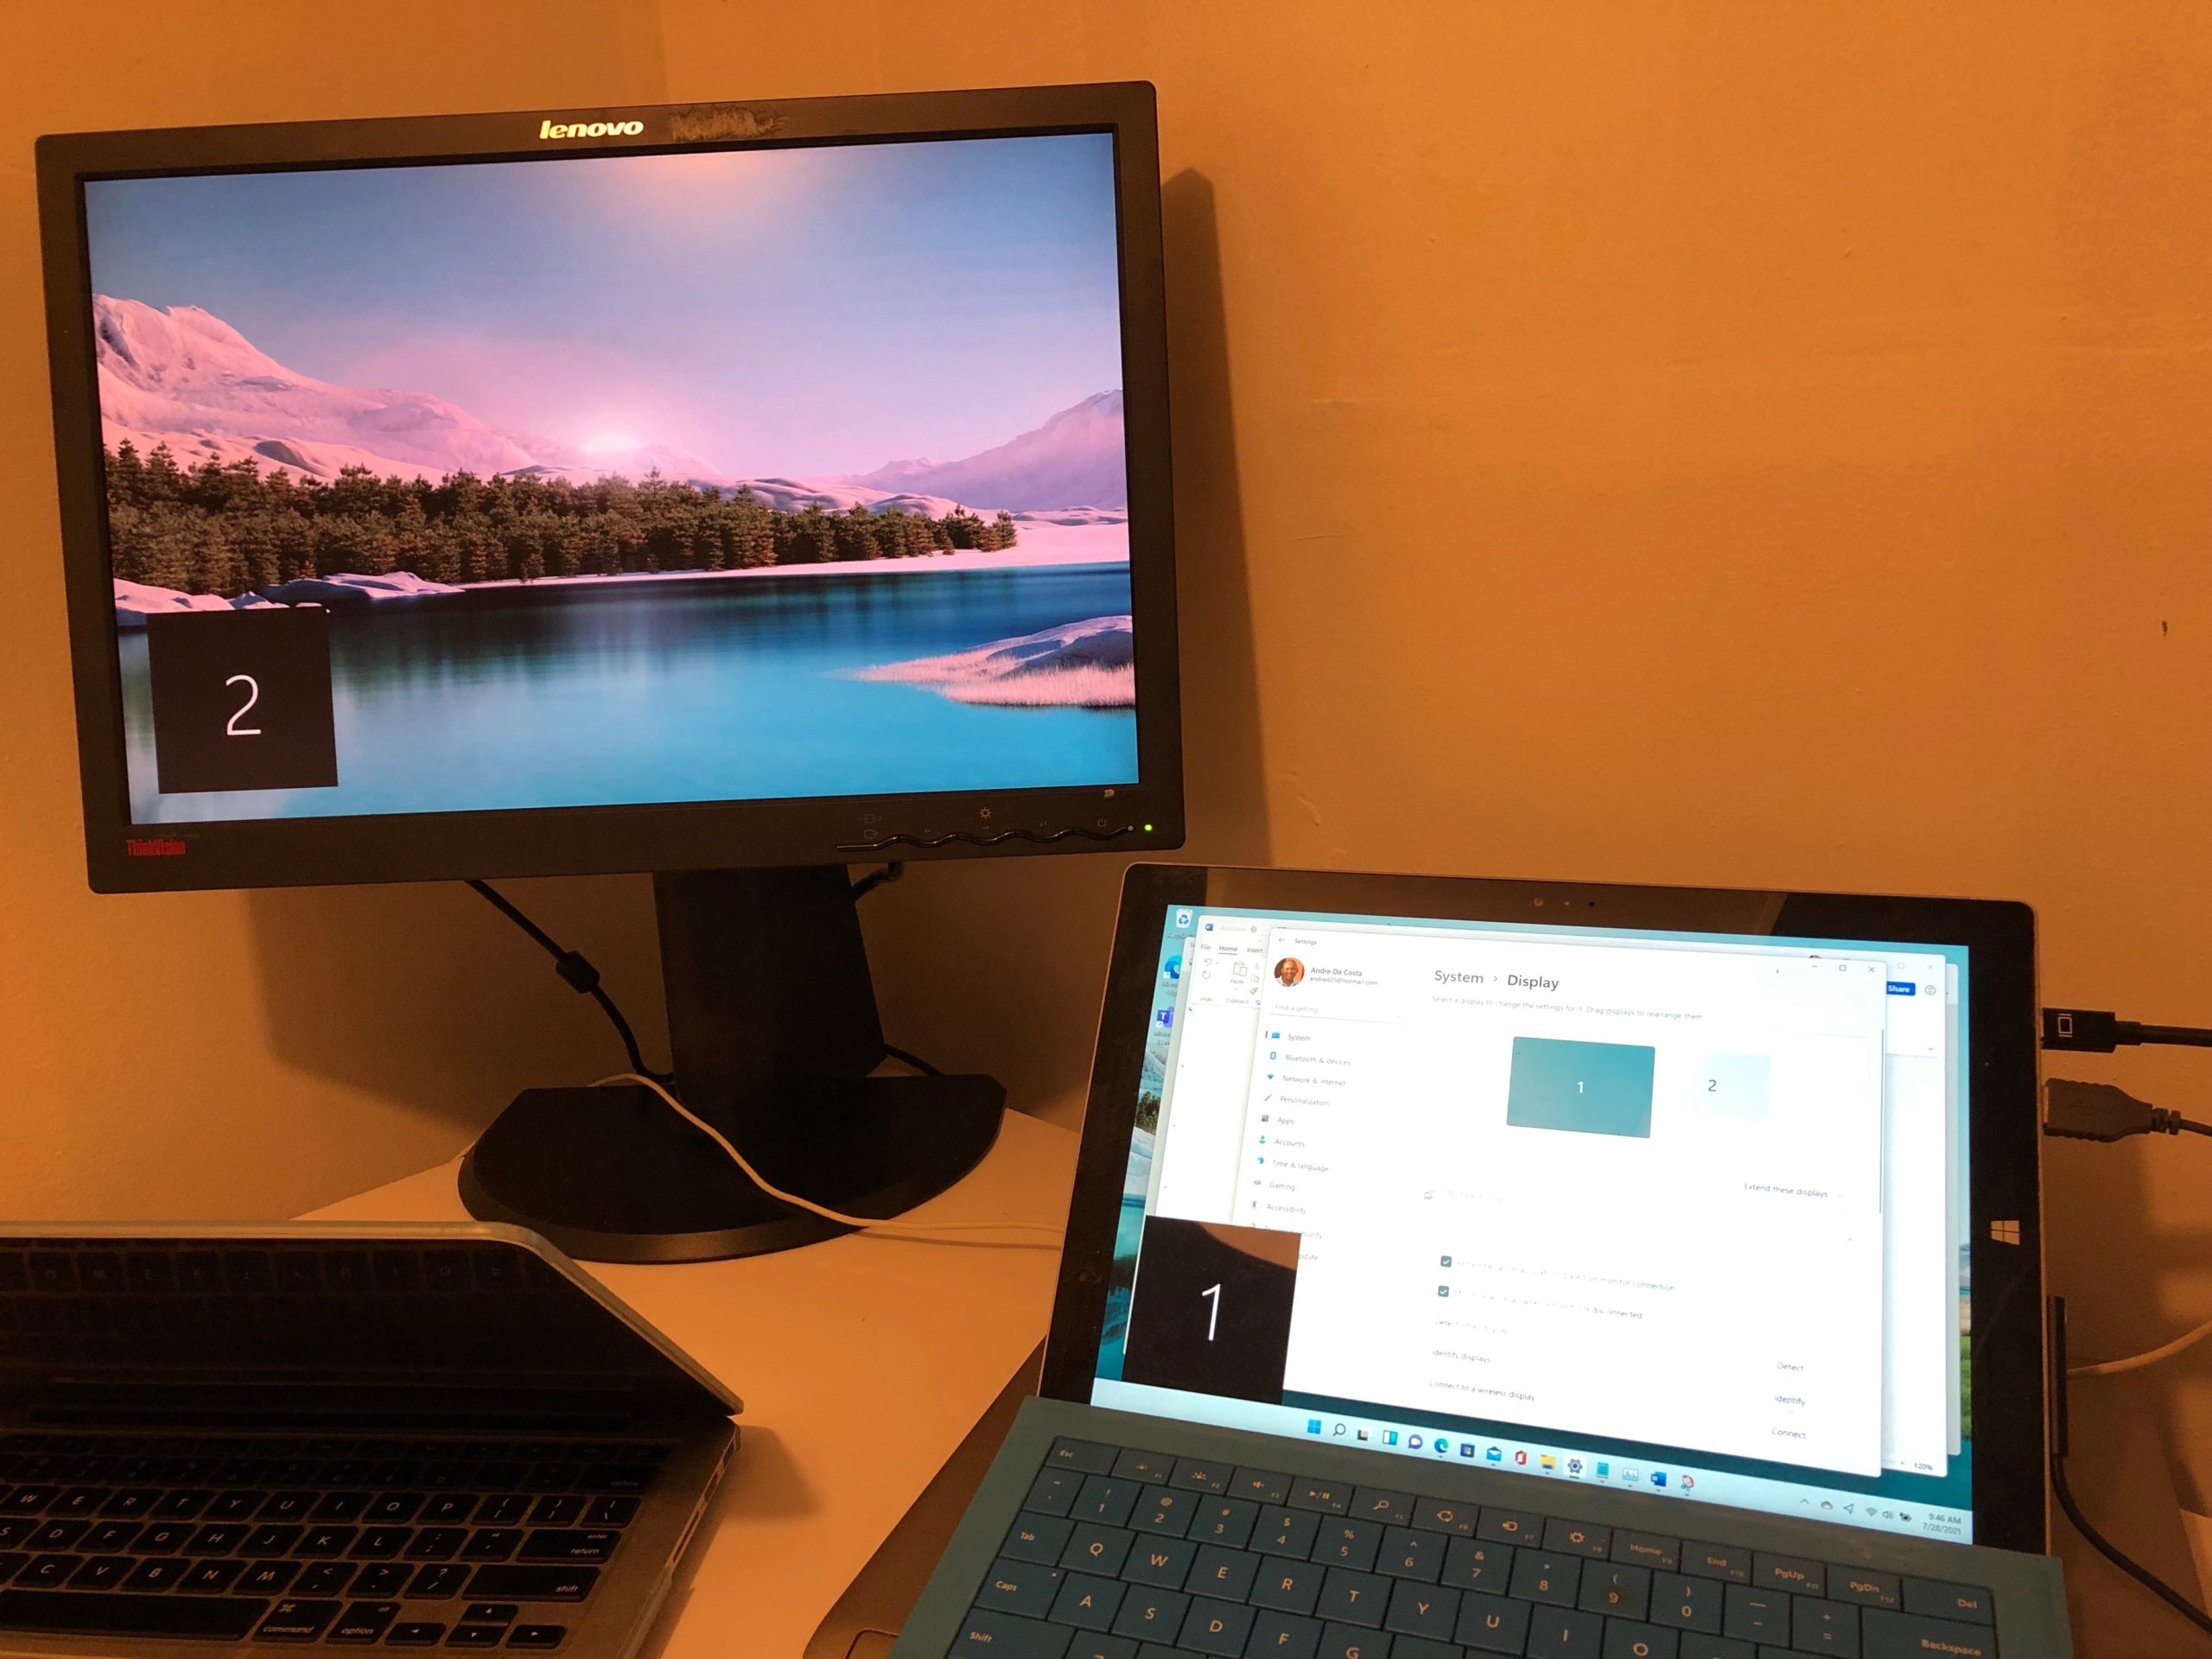
If you have a monitor and TV, then you need to use the multiple displays option in Windows 11 settings. In many cases you may be removing the far end HDMI cable seating on the monitor and plug it in the TV.
Detect all displays in Windows 11 display settings. Make the right display as the main screen. You should now be able to see the picture on the TV.
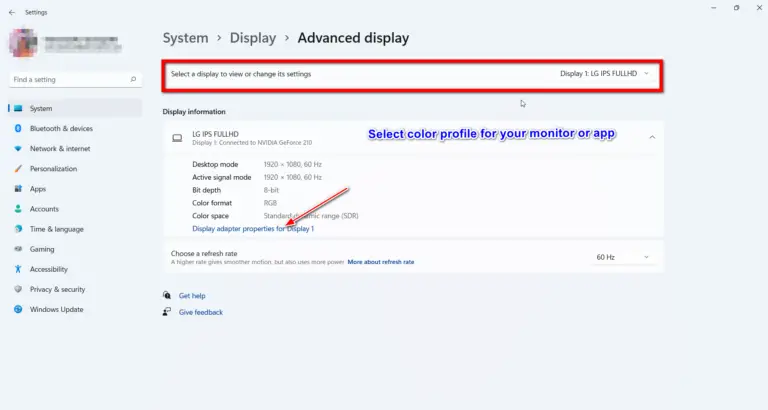
Detecting the second monitor can be done by using Settings > Display. Graphics driver on the computer should be updated.
Fix #2 – Select the second display as default
On connecting a Windows 11 computer to a Smart TV, using an HDMI cable, it will automatically detect the display. If you see a blank screen, then you need to make that display the default one. You have to make some changes in the Display settings.
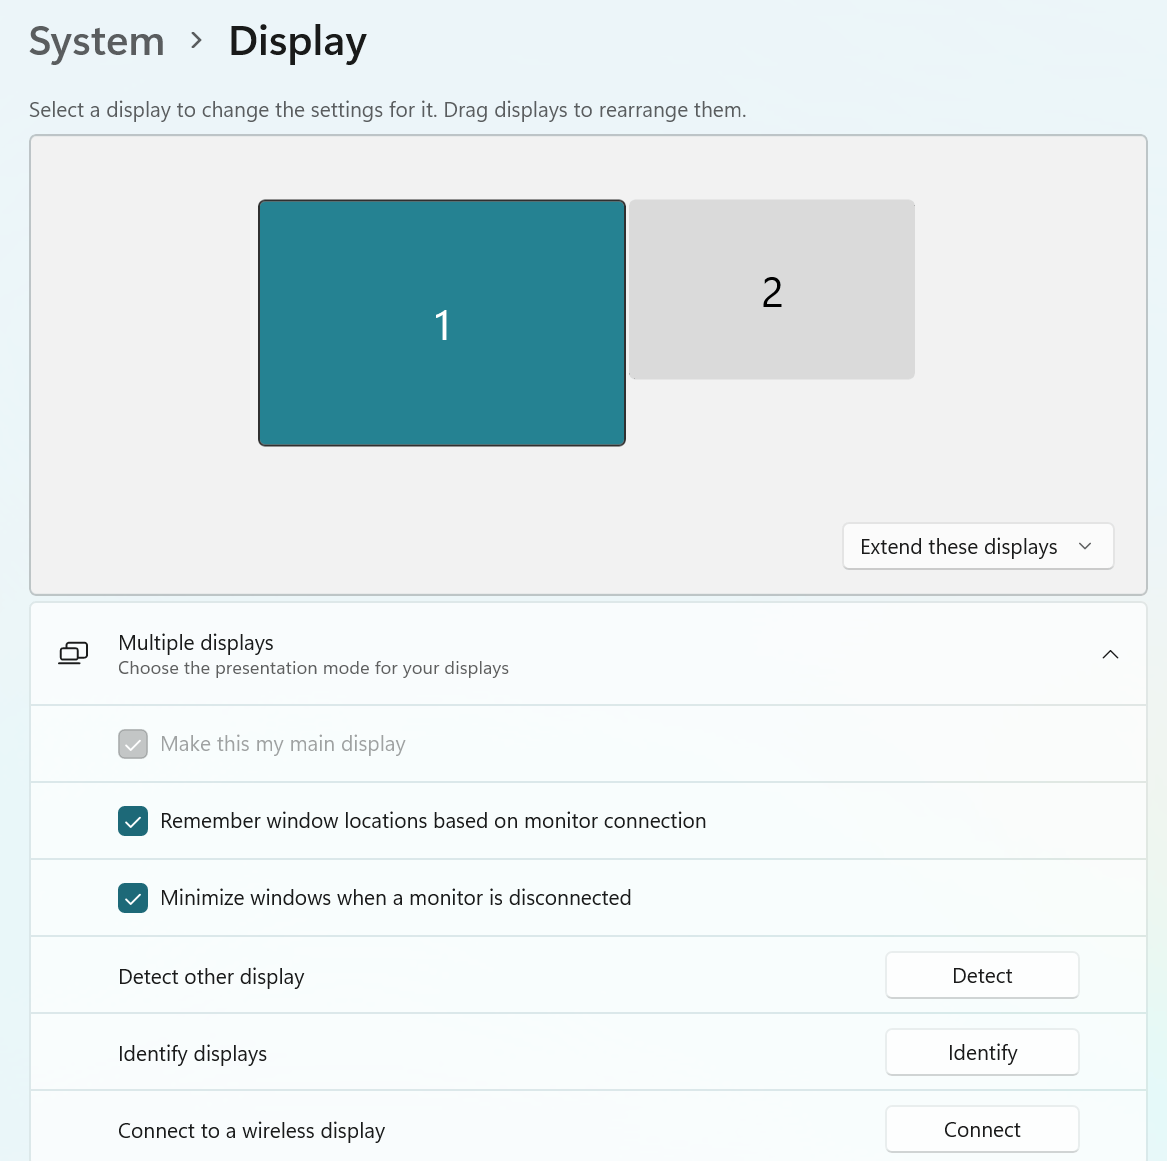
- Open the Settings > System > Display.
- Click on Identify to find all the relevant monitors.
- Number 1 and 2 will be shown.
- When you click on 2 further options like –
- Duplicate these displays
- Extend these displays
- Show only 1
- Show only 2
- Based on your requirement you can select the option.
The Settings window has many display options to set refresh rate and display orientation as well.
Fix #3 – Use Project Options
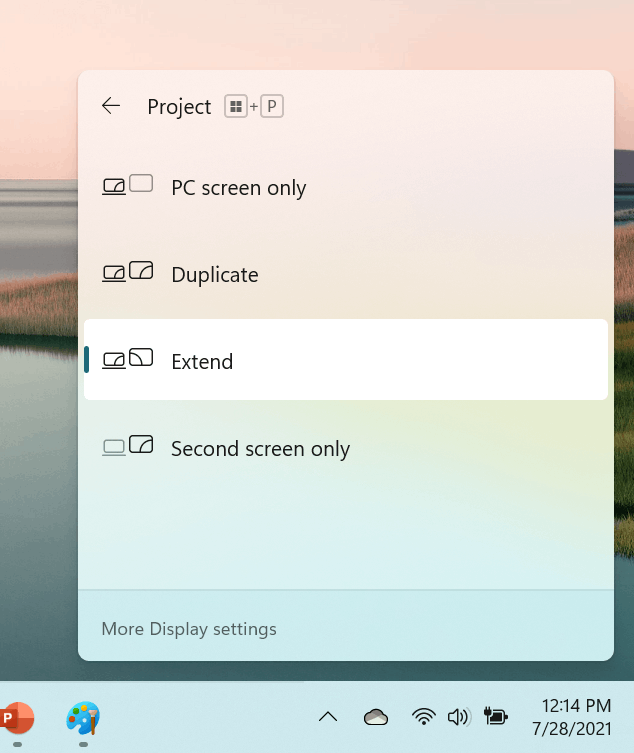
Press Win + P keys together to open the Project options. This is to make the right display the default AV device. The following options are available.
- PC Screen Only
- Duplicate
- Extend
- Second Screen only
In most cases, the first one is chosen as default. It will display the Windows 11 computer screen on your monitor. But if you select the second screen only and connect the HDMI cable to the TV, then Windows 11 will detect the HDMI TV.
Fix #4 – Check for Optional Updates
The Windows 11 OS will update your computer from time to time. In addition you can see the optional updates. These are related to external units, display and audio devices.
Click on the arrow against Advanced Options. Under the Additional options section, you can see Optional updates. Click the arrow against it.
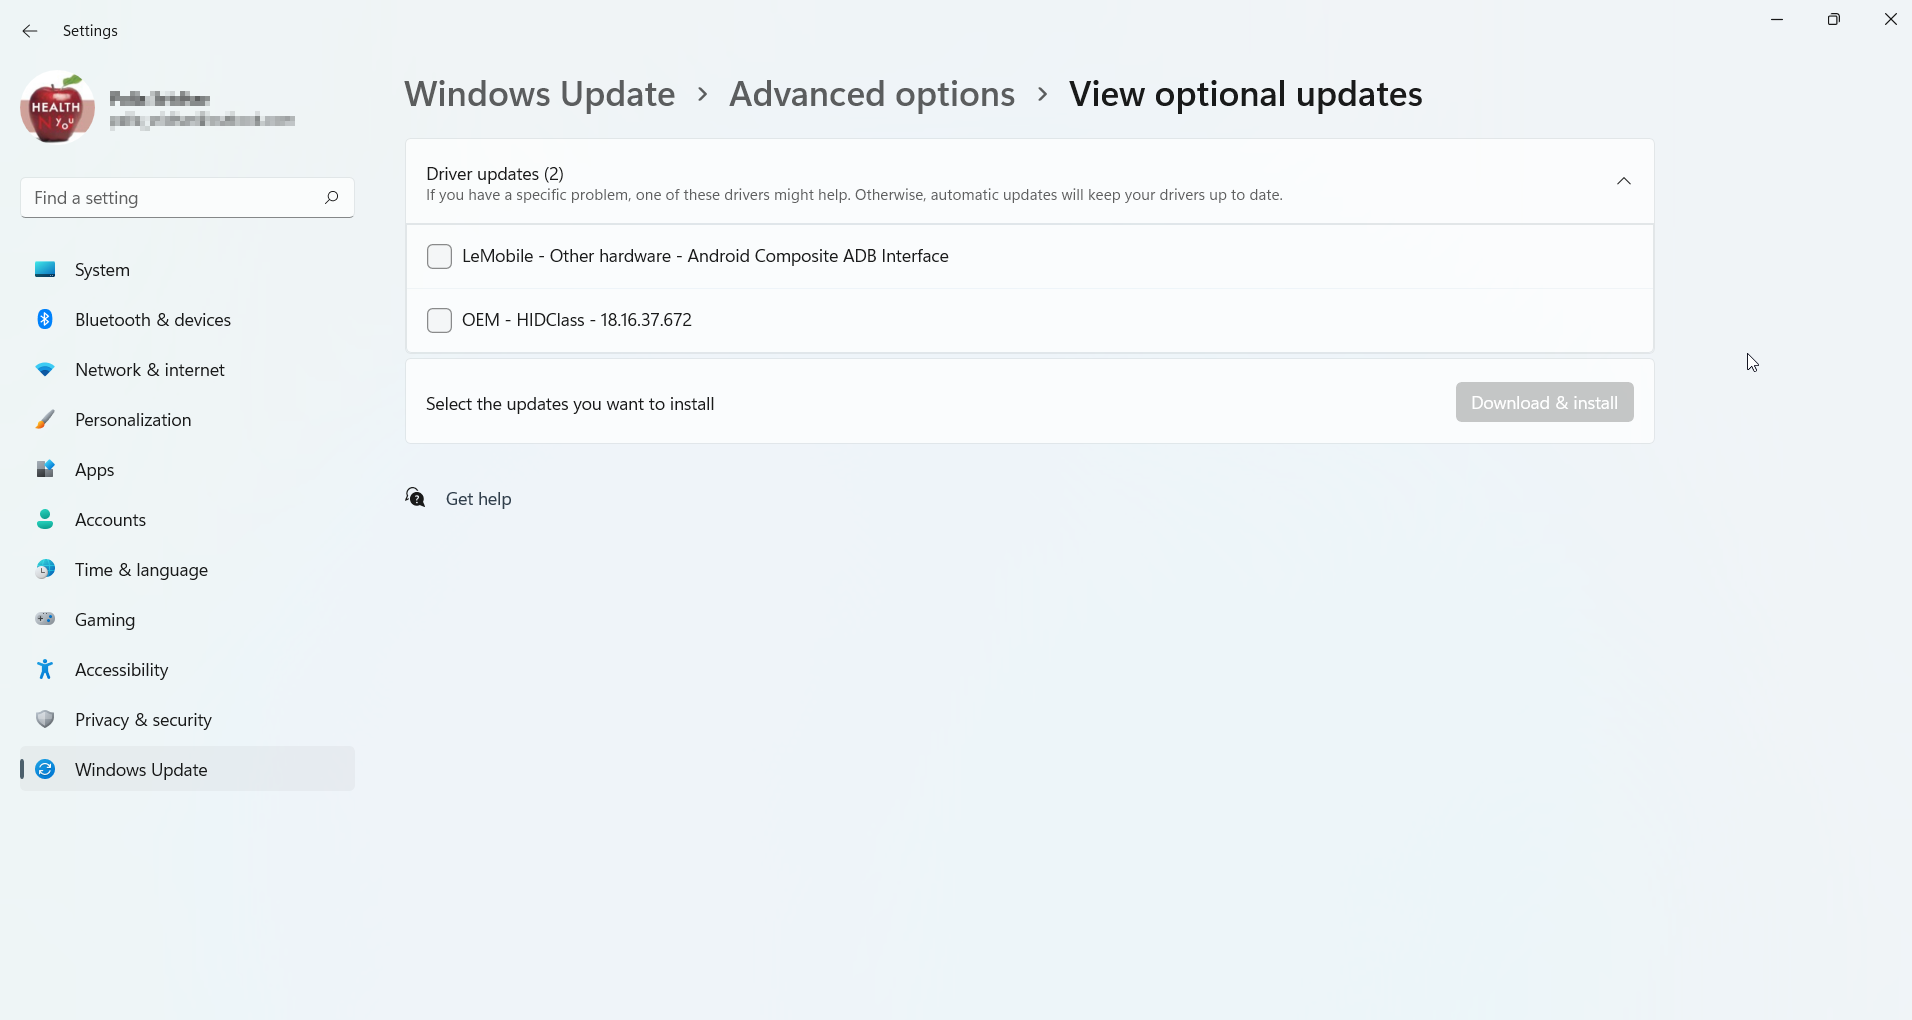
If you connect your Windows 11 PC to HDMI TV, you should see some updates related to the display. Download and Install them and restart your computer.
Fix #5 – Roll back to Previous Windows 11 Updates
Whenever there is a major Windows 11 update, your display may stop working. This can be an inherent problem in the OS or compatibility problem with TV and updates.
Roll back the driver if it’s causing issue.
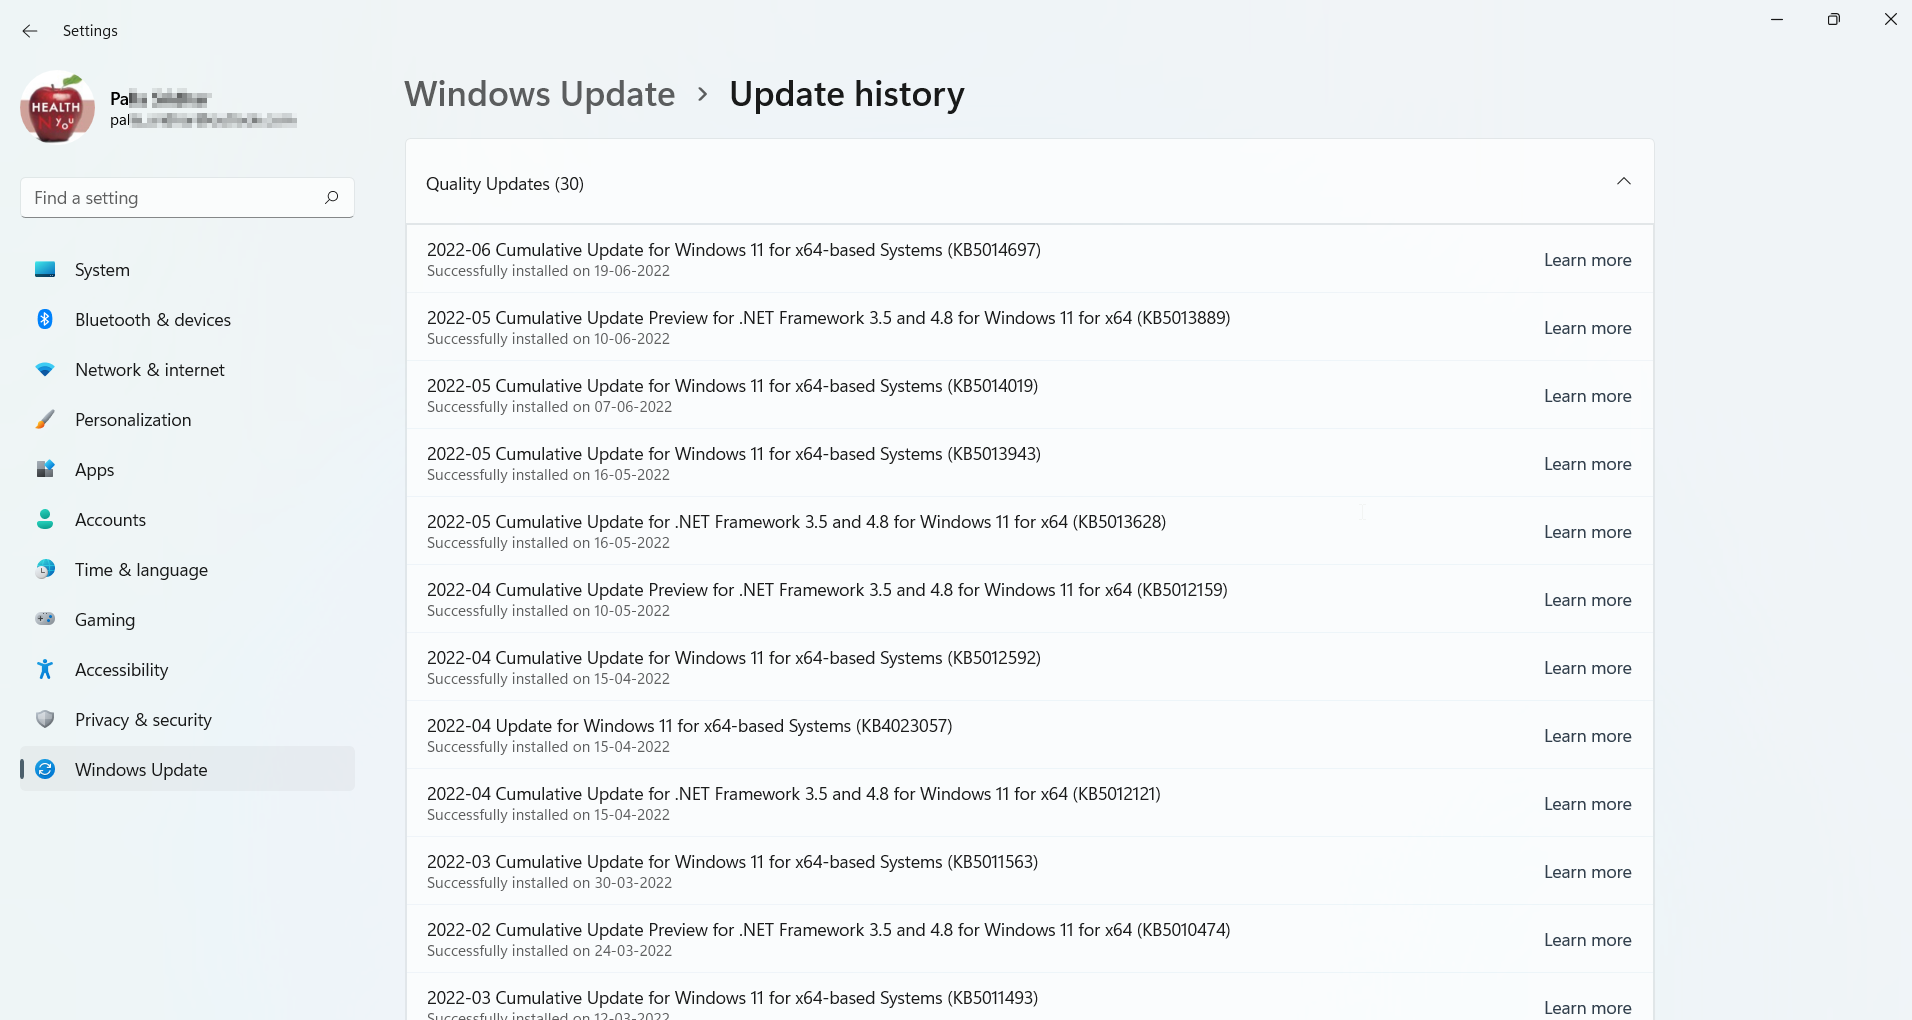
Till another minor update or correction is released, you can roll back to a previous version of the update. Go to Windows Update > Update history and scroll through to get to Related Settings. Below that Uninstall updates option is available.
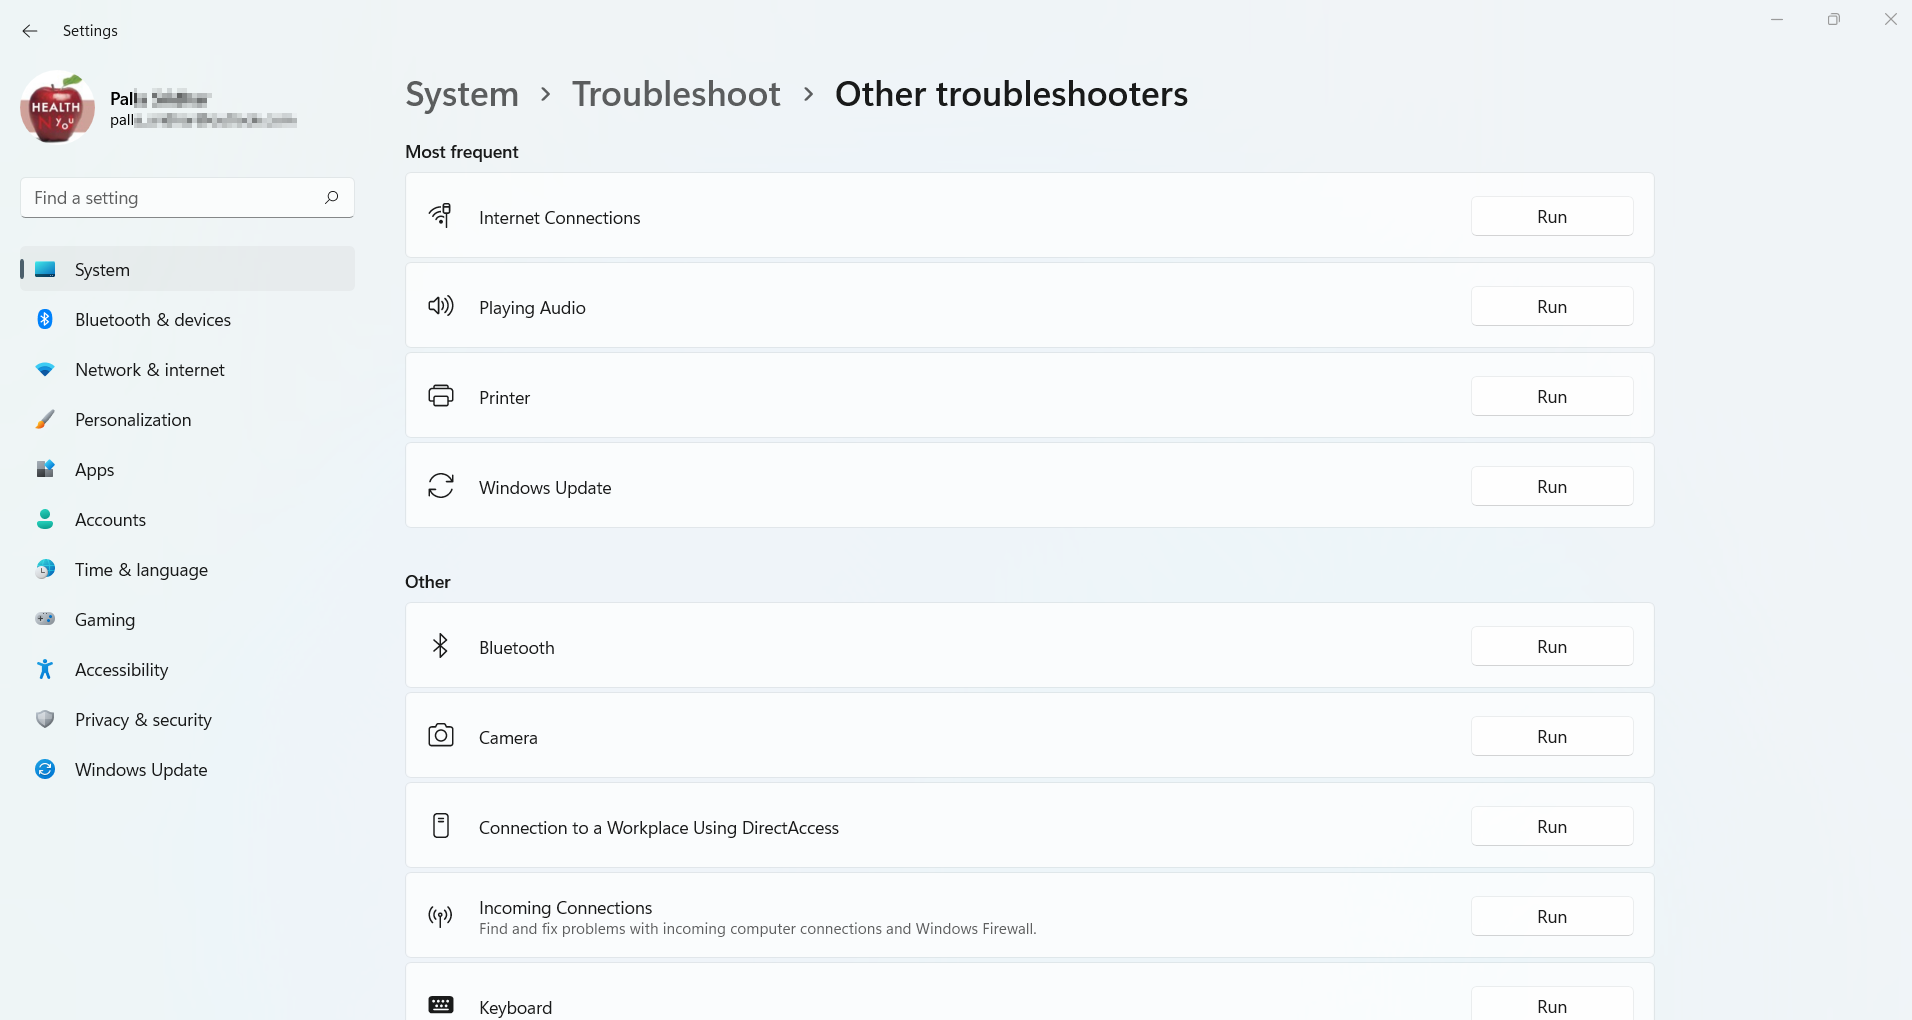
Fix #6 – Use System Troubleshooter to automatically fix problems
Go to System > Troubleshoot > Other troubleshooters.
There are various troubleshooters like Program Compatibility Troubleshooter, Power, Network adapter etc. If some of these are causing issues on your Windows 11 computer, you can run them and see if the display is coming back again on your TV.
Update display drivers using the graphics cards website or Device Manager in Windows 11. It can fix any display adapter problems.
Image Source: How to Add and Use a Second Monitor in Windows 11 and Windows 10 – Microsoft Community
Subscribe to our Weekly FREE Newsletter
You will get latest updates on Microsoft and Technology solutions every week.
- All data will be according to the cookie and privacy law pages of this site. Data will be stored on third-party sites to send newsletter campaigns.

![Disable Cortana Windows 11 – 4 Methods [Settings and GPO]](https://www.windowstechit.com/wp-content/images357/2022/04/disable-cortana-windows-11-settings-768x541.png)